
My worktable is topped off with a new design
I'm going to release soon that features easy wool applique combined with small doses
of traditional applique. This pattern will be great if you want a fun, fast
project or if you are new to applique and want to get your feet wet.


When I mentioned applique on Facebook recently, I received several comments
asking about my applique methods. There are all types of applique,
depending on the fabrics and materials you choose, and I'm going to show two of my favorites. There are lots of tutorials on the internet explaining the craft, but many of the techniques and instructions are vague or produce naaaasty results.
I'm going to let you in on my secrets to produce perfect applique every time.
For ease, I'm breaking my methods into two sections, so you can easily skip up
or down this post to the type of applique you're interested in:
- Freezer Paper Applique
- Hand-Applique with Wool or Woolfelt
Freezer Paper Applique
When I want to do traditional hand applique with
quilting fabrics, I always use the freezer paper method. It is simple to do and
produces perfect results every time. Some gals like a similar method called
"Needle-Turn Applique" (where you turn the edge of the patch under
with the tip of your needle as you stitch along), but in my opinion, the simple
freezer paper method is the only way to fly. Like anything else, there are lots
of ways to do freezer paper applique, but I've found the following is the
simplest method and achieves the best results:
Making the Patches: Trace your pattern template onto the non-shiny side of freezer
paper. Carefully cut it out along the traced line and then position it with the wax-side-up against the wrong side of your
quilt fabric. Use a small dab of washable glue to
temporarily tack the freezer paper to the fabric. A lot of tutorials recommend expensive fabric glue, but I've had great success with plain old washable glue sticks I find in the crayon section of my local department store. Cut around the template, leaving a scant 1/4"
margin of fabric on all sides.
Beginning along one edge, use your
fingertip to fold the edge of the fabric over onto the freezer paper, following
your fingertip with the point of a hot, dry iron. You may need to
carefully clip any curves or points as you work along. The fabric will
temporarily fuse to the freezer paper as you work your way around the
shape. Leave the freezer paper there for now; you will remove it in a
later step.
Appliqueing the Patches: I recommend using a small, fine
needle (sometimes called a “straw needle”) and a single strand of thread. I go against convention by recommending you use thread that closely matches the background fabric, rather than the
patch. Using thread that matches your background fabric tricks the eye and
causes it to skip over and miss the stitches, making them nearly
invisible. In the picture below, I used a single strand of cream thread for my applique, and it's nearly impossible to see my stitches. If I had used blue thread, it would have shown up against the cream background (no-no!):
Begin by tying a small knot in the end of your thread. I often use plain old embroidery floss, because it comes in almost
unlimited colors and I have a huge basket of it in my workroom. Come up from the back and bring your
needle up through the background fabric at a point just
exactly next to the patch. Take your needle back down
through the very edge of the applique patch, catching only a thread or two of the
edge of the patch. Working from right to left so you can see where to
next place your needle, move over approximately 2/8” and come back up through
just exactly next to the patch, and then back down, again catching just the
very edge of the patch with your needle. The intent is to make tiny,
controlled stitches for nearly invisible applique. You are going to get a
nice rhythm in a very short period of time and you'll find it takes no time at
all to finish stitching around your patch with perfect results.
You might notice that I ask you to come up from underneath the patch and then back down through the edge of the patch. Again, I'm going against convention here, but I find that this method ensures the patch fits snugly and evenly against the background.
Removing the Freezer Paper Backing: When you are done stitching
all the patches to the background, turn your project over so it is face down
and cut a small slit in the background fabric just behind each appliqued patch.
With tweezers, reach through the slit and remove the freezer paper (if you
tug carefully, the freezer paper should come out in one piece). Use a fine
needle and a single strand of thread to whip-stitch the slit closed.
Hand-Applique with Wool or Woolfelt
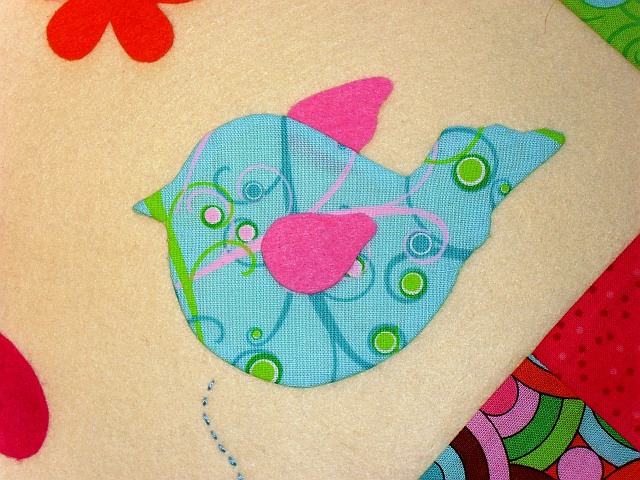
The easiest method of applique is wool applique, which is often used for folkart and primitive projects. You can buy 100% wool off the bolt or internet, or you can recycle it from used clothing. 100% wool needs to be prepared so it does not fray (you can prepare 100% wool by washing it in very warm water, rinsing in cold, and then placing it in the dryer on warm setting until dry). I also like to use a product called "Woolfelt" for projects like the one shown at the top of this post. Woolfelt is a wool/rayon blend fabric I purchase through Wool Felt Central. Woolfelt does not need any preparation, is ready to use as-is, and comes in many colors.
Making the Patches: To applique with wool or Woolfelt, place your pattern template pieces face down onto the non‑shiny side of freezer paper (freezer paper has a wax coating on one side and you can usually find it alongside plastic wrap in your local grocery store). Trace around the template pieces and then loosely cut around them, leaving a small waste margin around each piece. Place the freezer paper pieces with the wax-side-down onto the wool or Woolfelt and use a fairly warm iron to briefly bond the freezer paper to the wool. The freezer paper will temporarily stick to the wool, but will not leave a permanent residue. Once the pieces are ironed to the wool, carefully cut out each piece along the traced lines and peel away the freezer paper.
Lay out your wool pieces against the the fabric you have chosen for the background. When you are satisfied with the layout, use washable glue to temporarily tack the pieces into place so you can stitch around them. Again, you can use expensive fabric glue from your quilting store, but I've had great success with plain old washable glue sticks I find in the crayon section of my local department store. If you make a mistake, carefully remove the wool patch and dab the back with a warm washcloth to remove the glue.

Appliqueing the Patches: The wool patches are attached to the background with one or two strands of your favorite threads. I like to use two strands of embroidery floss, wool thread or Valdini brand threads. I most often use the "blanket stitch" around the outside edge of each piece, which you can see in the photo above and as illustrated below. The blanket stitch is worked from left to right. Bring your needle up from underneath at the edge of your patch. Move to the right approximately 1/4”. Push your needle back down through both the patch and the background at a point about 1/4" from the edge of the patch and then come back up again at the edge of the patch. Be sure to loop the thread under the needle as you complete the stitch. Each stitch should be about the same length and distance apart:
I finish by embellishing the patches and background with charms, buttons and decorative embroidery stitches:
That Sums It Up . . .
Except . . . you might be wondering how do do
all the decorative stitches that are often used to embellish applique,
particularly if you are working with wool. A lot of ladies tell me they
don't choose projects that need much embellishing, because they are not sure
how to do the stitches. Coming next week, I'll do some picture tutorials
showing you several of the most commonly used stitches, such as the daisy
chain, running stitch, feather stitch and many more.
Stay tuned, and leave me a comment or email me if you have any questions. In the meantime, Happy Stitchin'! xoxo--Melanie
Melanie, your tutorials are wonderful. I appreciate the detailed instructions, as well as, why I do something a specific way. Best wishes to you and thanks for this posting. :-)
ReplyDeleteThanks for your nice comment! I hope the tutorials help. Have a great day! --Melanie
DeleteI'm excited to start. Thanks for sharing your experiences.
ReplyDeleteGood, I'm glad you're excited! How are you doing on the patterns you purchased from me? Let me know if you have any questions; I'm always happy to help. --Melanie
DeleteHi! You say you dont need to wash woolfelt?? But i thought you had to? If you had to wash the finished project later, wouldn't the colors run?
ReplyDeleteThanks
Loretta
Loretta_22554@yahoo.com
Melanie, I have done every type of sewing there is out there, except one, applique. I have been doing a lot of research as to the easiest, fastest with the best results. Your article confirms what a lot of the well known fabric artist all say as far as using freezer paper. I am looking forward to getting started and having a project that I am going to enjoy and love the results. Thank you for sharing! ~Trish Smith
ReplyDeleteMelanie, I have done every type of sewing there is out there with the exception of applique. I have been doing a lot of research and your article confirms what all of the best known fabric artist say about using freezer paper. I am excited to get started working on a project that I am going to enjoy and love the end result!
ReplyDeleteThank you for sharing!
Oh Trish, you are going to have so much fun doing applique this way! In fact, I happen to be working on a new project this weekend that involves freezer paper applique. Thanks so much for visiting my blog and for commenting! --Melanie
ReplyDeleteHow do you back your appliqué work?
ReplyDelete