Monday, January 30, 2012

New Pattern Tutorial for Snow Days (and a Baby Lamb!)

I promised I would begin a tutorial for my newest design, "Snow Days", which I hope to release in the next week or so.  It's a cute and fun pattern for a 14" candle mat you can make from wool or wool felt.  If you've been reading my previous posts, you know my patterns work equally well with either wool or wool felt and you can use either one depending on your budget and personal preferences.  I'm always torn between the two, because they each lend their own look to a project and I can never decide which I like best!

I hope you enjoy this tutorial, because I think you'll realize as you follow along that none of the steps to make your own "Snow Days" candle mat are set in stone.  You can change the colors and even the shapes or order of the snowmen to fit your own taste.  Like I always say in my patterns, relax and enjoy yourself, since creating is part of the fun!  Here we go . . .

"Snow Days" Tutorial (Part 1)

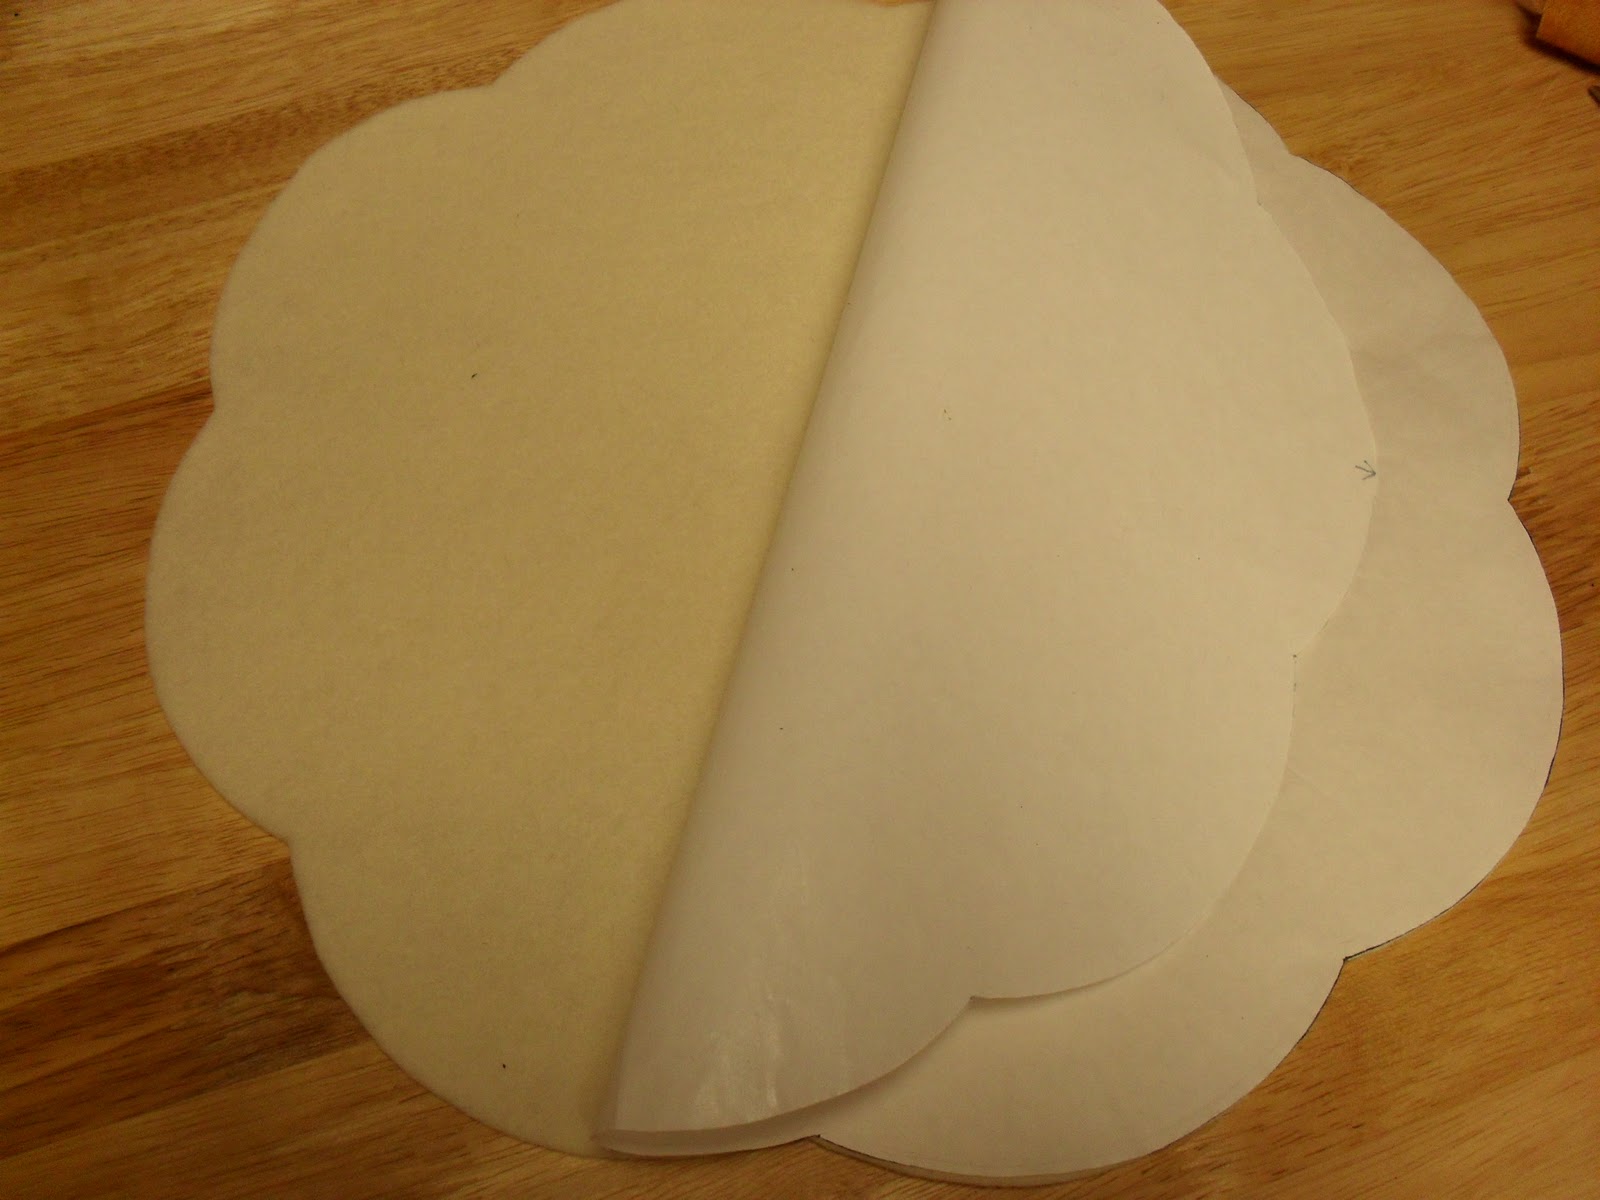
This candle mat is smaller by an inch than my previous "Halloween Jacks" candle mat because I wanted to cuddle the snowmen a little closer together.  The other difference between this candle mat and "Halloween Jacks" is we have two scalloped background templates for the front of your mat, a small one and a large one.  We'll be stitching the snowmen to the smaller scalloped piece and then attaching that to the larger piece.  We'll also use a third scalloped piece to make a backing for our candle mat so it's nice and finished (so your mother-in-law can't see all the little knots and tails on the back!).  Of course, both the small and large background templates will be included with the pattern.

Tracing the Backgrounds and Snowman Heads:  The scalloped templates are traced onto freezer paper which is then ironed to the back side of your wool or wool felt.  I then use a sharp pair of scissors to cut them out.  I used navy blue wool for the smaller scalloped piece and deep red for the larger, but there are no rules here and you can use whatever colors you want:

I then traced the snowman head eight times (for eight heads) onto freezer paper which I ironed onto cream-colored wool.  Once the the heads were pinned in place against the navy background, I stitched them down with a blanket stitch that is illustrated in the pattern.  It was easy and I managed to do the stitching while I watched a bit of television . . .


What Colors Do You Like?  Next, it's time to "audition" the wool to see what colors you like best against the background.  When a piece of wool is auditioning, it's just like an actor trying out for a part in a play.  The wool auditions for the part to see if it fits and looks good with the rest of the design!  I tried about twenty different color combinations for the noses and hats.  You can use the colors you'll eventually see in the finished pattern or choose your own.  Remember, there are no rules here and none of your friends will know!

It's Not Set in Stone!  At this point, I decided one of the noses was too big for snowman number three, so I cut the nose template waaaay down and made a smaller nose.  That's what I mean when I say nothing with this pattern is set in stone.  If you don't like the size of a nose, cut it smaller.  If you think the eyes should be bigger, trace and cut them a little bigger.  I tried several different noses and eyes before I finally decided on my favorites and stitched them to the background.

[The nose is waaaay too big - I'll cut it down smaller!]

You might also notice a little trick I use to hold some of the wool pieces in place while I stitch:  Staples!  I usually use water-soluble fabric glue to tack the pieces in place, but sometimes I cheat and staple them to my background.  Once they are stitched into place, I remove the staples with the tip of a steak knife.  Way too easy!

Part 2 of this Tutorial will come a bit later this week, where I'll show you how to embellish the faces and hats, finish the edge of the smaller scalloped background and attach it to the larger red scalloped piece. I'll also show you how to add a backing to your candle mat so it is nice and full and lays flat.  I love to embellish with embroidery thread, and you'll find out just how easy it is!  Click Part 3, for the last and final tutorial on "Snow Days".

I need to close now, but I couldn't part without showing you a couple of personal pictures.  While enjoying the snow this weekend, hubby and I visited some friends in Prairie, Idaho.  Prairie is aptly named and one of the prettiest places on earth because you see flatland and foothills in every direction.  We arrived just in time to see a newborn lamb trying to stand on its own for it's first dinner!


We were also visited by Torry, one of the friendliest sheep in Idaho who wanted his ears and head rubbed . . .


and a few others from the herd who were waiting for their own dinner of oats and hay . . .


Well, that's it for now--I've gotta get rolling on the rest of the "Snow Days" candle mat, besides needing to get the rest of my paperwork done for the tax man (yikes! isn't that a terrible thought!).  In the meantime . . . Happy stitchin'!  -- xoxo Melanie

Friday, January 27, 2012

Christmas in January? Oh My!

You've all heard by now that I'm preparing a line of new designs for Spring Quilt Market in May in Kansas City, and that means I'm working the first three months of this new year on fall and Christmas designs for 2012.  I know you feel like you just finished Christmas, but really, what better time of year to start your holiday stitching projects than right now?  In my part of the world (Idaho, USA), it's still cold and there's snow in our mountains, so stitching beside a warm fire is a welcome activity during our cold winter evenings.  So what do I have cookin' now for you?  How about a cute snowman candle mat I've begun this week that's only just made it off the drawing board . . .


I'll start a tutorial on how to make this candle mat next week, but in the meantime I wanted to show you how a design is born on my worktable. First, I start with a very general idea of how I'd like the finished project to look.  When I say a very general idea, that's exactly what I mean!  It's a rare thing for my initial idea to look anything like the final design, as it alters and morphs as work along.

Next, I get out a sheet of graph paper, my rulers, tape and drawing pencils, a humongous eraser and, oh!--I almost forgot--a glass of wine. Yep, I'll admit that most of my designs are created under the influence of a single glass of cheap boxed red wine accompanied by by other best friend, sharp cheese.  Mmmmm, cheeeese.  I tell my hubby there's no room for sissies here--designing is hard work!  Anyway, after the wine has sat a bit, I quickly start to draw my idea out on the graph paper with a very light hand.  I probably draw the initial sketch in under two or three minutes.  My design looks pretty bad, because I'm no artist and nothing I draw is going to look good in under three minutes.  To make matters worse, I take off my "up-close-big-girl-glasses", scrunch up my nose and eyes and try to envision how it would look if I could really draw.  Believe it or not, that process gives me a rough idea of how the whole thing is going to fit together and how it might eventually look when I apply it to wool or fabric.  And to think I owe it all to some badly-harvested grapes grown somewhere in California!

I begin drawing in earnest at that point, although I try not to over-think the design.  If one of my snowmen starts to look like anything more than a blob on the page, I immediately draw over my pencil lines with a fine-point Sharpie marker so he can't be changed anymore.  I think that keeps me from worrying a design to death.  Sometimes, I'll use a photocopier to make mirror images of certain parts of the design or to make it easy to repeat a portion like you'll see in this photo mat . . .


That's basically all there is to it.  Once the design is worked out on paper, I trace the individual components onto clear plastic and then onto the colors of wool I have chosen for the project.  I sometimes end up with several different colors of noses or hats which auditioned for the candle mat and eventually end up on the cutting floor (I wish there was something reasonable I could do with all those tiny little pieces of wasted wool!).  And that, girlies, is how a design is born on my worktable.

Well, I gotta close now, as I'm headed to the mountains this weekend to play in the snow with my hubby. Yes, I'm taking some stitching with me (isn't that sick?).  Be sure to check back next week when I begin the tutorial for this snowman candle mat and also announce the winner of my "Halloween Jacks" pattern.  If you haven't entered yet, be sure to check out my contest rules you can find in my last three posts.  It's real easy to enter and I hope you win!  Until next time . . .

Happy stitchin'!   xoxo--Melanie

Wednesday, January 25, 2012

Tutorial (Part 2 of 2) for "Halloween Jacks" Candle Mat

For those of you following along, this is Part 2 (and the final part) of a Tutorial for my new "Halloween Jacks" pattern for an approximate 15" candle mat.  Part 1 of the Tutorial can be found here.  This is a fun and [very] easy project you can make from 100% wool or wool "felt" (which is a 35% wool/rayon blend you can find for a lot cheaper at fabric stores).  I received overwhelming response for pre-orders of this pattern (thank you!!) and the pattern is now back from the printers and ready for shipping.  You can click on the "Halloween Jacks" picture in the right-hand column of this blog, or you can get more information here.  Your copy of "Halloween Jacks" is available for $9.99 through snail-mail with FREE shipping or for $7.99 by e-pattern download.


By the way, if you haven't ordered yet because you're hoping to win my contest for a free copy of Halloween Jacks that I'm giving away at the end of January, I'll up the ante a little and be happy to refund your money if you are the lucky winner!  I've included info on how to enter at the end of this post.

Here's Part 2 of the Tutorial, and I hope you enjoy it!


Halloween Jacks Tutorial - Part 2 of 2


Let's Embellish!  In Part 1 of this Tutorial, we learned the difference between 100% wool and 35% wool "felt", how to trace and cut out the design, and about stitching the jack-o-lantern faces to the background. We also learned that by this point in your project, your candle mat is probably looking a bit lumpy and bumpy, and not to worry because we're going to fix that.  For the moment though, we've come to my favorite part of making the candle mat:  Embellishing!  You'll notice there are sixteen [yikes, sixteen!] little teeny centers for all the eyeballs in this candle mat.  Don't worry--the pattern gives you a quick little tip for cutting out 16 perfect circles in probably a minute.  Those little black dots are stitched to the mat with a single stitch in the center, making a very fast job out of finishing the eyes.  The smiles are stem-stitched, and again, instructions and diagrams for that stitch are included in the pattern, as well as an easy way to finish the teeth.


It's Time for Steam:  If your project looks anything like mine, your candle mat is looking a bit shoddy right now, your stitches might look uneven, and the wool might be puckering.  We'll that's exactly how it should look for as much handling as it's had.  My pattern shows you how to steam iron your candle mat so it is nice and flat, and you'll find that steaming also makes your stitches uniform.  Problem fixed!

We've Come to the End of the Story:  You could stop right now and simply blanket stitch around the outside scalloped edge of your candle mat, and it would look just fine.  But I wanted my mat to be thicker and plush, and I also wanted to hide all my little stitches and tails on the back.  To do that, I added 35% wool felt backing.  I chose 35% wool felt for the back because it's cheaper and generally thicker than 100% wool and I love the thickness it provided for my mat.  I've included the template for the backing in my pattern and it makes an easy job of cutting a perfect backing for your candle mat.  Carefully line up the edges, and bam!  You're ready to blanket stitch the layers together, which by the way, creates a wonderful finished edge.  A tiny steam bath again, and your candle mat is finished!


Win Your Free Copy of "Halloween Jacks"!  That's it for the Halloween Jacks Tutorial, and I hoped you enjoyed it.  Don't forget that between now and January 31, you can win a FREE copy of the Halloween Jacks pattern I'm giving away.  There's lots of ways to enter, and you can do ONE or ALL of the following to get extra chances to win:
  • Leave a comment on this blog = 1 chance to win
  • Become a follower of this blog = 1 chance to win
  • Get a friend to leave a comment or become a follower of this blog (be sure to let me know who your friend is) = 1 chance to win
  • Share this blog post on your Facebook page (there's a little Facebook link in the left-hand column of this blog) (be sure to let me know) = 1 chance to win


Gotta close now, as I'm applying the stitches on a cute new Christmas candle mat that I'll start yakking about later this week.  In the meantime, Happy Stitchin'!  -- xoxo  Melanie


Monday, January 23, 2012

Tutorial for "Halloween Jacks" Candle Mat

I promised to provide a tutorial for my new "Halloween Jacks" pattern for an approximate 15" candle mat, and here it is!  The pattern should be back from the printers today, so all of you who have pre-ordered will be the first to get their pattern before it hits stores in late spring.  For those of you just joining my blog, you can receive your copy of "Halloween Jacks" for only $7.99 with FREE shipping until the pattern is posted to my website on Tuesday, January 24 (after that, the pattern is is at regular price of $9.99--still with free shipping).  If you haven't pre-ordered because you're hoping to win my contest for a free copy of Halloween Jacks that I'm giving away at the end of January, I'll up the ante a little and be happy to refund your money if you are the lucky winner!  I've included info on how to enter at the end of this post.

Here's the tutorial, and I hope you enjoy it!

Halloween Jacks Tutorial - Part 1 of 2


So Many Choices, So Little Time!  This is such an easy pattern to make, and you can use either 100% wool or 35% wool "felt".  Real 100% wool is expensive, but lends itself to hand-dying and is very durable.  Wool felt (35% wool/rayon blend) usually comes on rolls at your favorite fabric store, is ready to use right off the bolt, comes in many colors and is much less expensive, but is not washable and is not as durable as 100% wool.  If you choose 100% wool, it needs to be “felted” first so it does not fray. You can felt real 100% wool by washing it in very warm water, rinsing in cold, and then placing it in the dryer on warm setting until dry. The wool will shrink and the fibers will bind together or “felt”.  Finish by pressing with a steam iron set on wool setting. The wool can now be cut and used without the edges fraying. For the model I created for this pattern, I used 100% wool for the front of the candle mat and 35% wool felt for the backing.  Whether you use wool or wool felt, relax and enjoy yourself, since creating is part of the fun!

Tracing Onto Freezer Paper: The template for the scalloped background is first traced onto freezer paper. The freezer paper is placed waxy-side-down and ironed onto whatever color wool I have chosen. The freezer paper is very important because it stabilizes the wool and holds it firmly while you cut:


Cut along the lines, pull the freezer paper off, and voilà! You have a perfect scalloped background:


The rest of the template pieces are then traced onto freezer paper and ironed to whatever colors of wool you have chosen for the faces, eyes, noses, mouths, etc.  [For those who order the Halloween Jacks pattern, I provide a nifty little trick for cutting out the sixteen (yikes! sixteen!) little black dots that go in the eyes in about a minute.]   Here, you can see how I traced one of the pumpkins onto freezer paper and now I'm ready to iron it to the wool: 


Laying Out Your Design:  I have to admit that the previous step tracing and cutting the template pieces from wool is my least-favorite part of the process (kind of like filing or cleaning a shower stall).  We're coming to the part that I consider more enjoyable: Laying out the design and getting ready for stitching.  It's very easy to lay out the pieces for this candle mat because I include a full-color photograph and a master diagram with the pattern.  When you are satisfied with the layout of your jack-o-lanterns, they are blanket-stitched to the mat using either embroidery floss or DMC pearle cotton thread. Instructions are included in the pattern for the blanket stitch, including instructions on how to hold the template pieces in place while you stitch, etc.


Oh No!  It's Lumpy and Bumpy!  By now, the front of your project probably looks uneven and you might be a bit discouraged.  Don’t worry, we’re going to fix that in Part 2 of this Tutorial coming later this week, along with embellishing your candle mat and attaching a back to cover your stitches.

That's It for Part 1, How to Win Your Free Copy of "Halloween Jacks"!  That's it for Part 1 of the Halloween Jacks Tutorial.  Click here for Part 2 of the Tutorial.  How-ev-er, don't forget that between now and January 31, you can win a FREE copy of the Halloween Jacks pattern I'm giving away.  There's lots of ways to enter, and you can do ONE or ALL of the following to get extra chances to win:
  • Leave a comment on this blog = 1 chance to win
  • Become a follower of this blog = 1 chance to win
  • Get a friend to leave a comment or become a follower of this blog (be sure to let me know who your friend is) = 1 chance to win
  • Share this blog post on your Facebook page (there's a little Facebook link in the left-hand column of this blog) (be sure to let me know) = 1 chance to win
Gotta close now, but in the meantime, Happy Stitchin'!  -- xoxo  Melanie